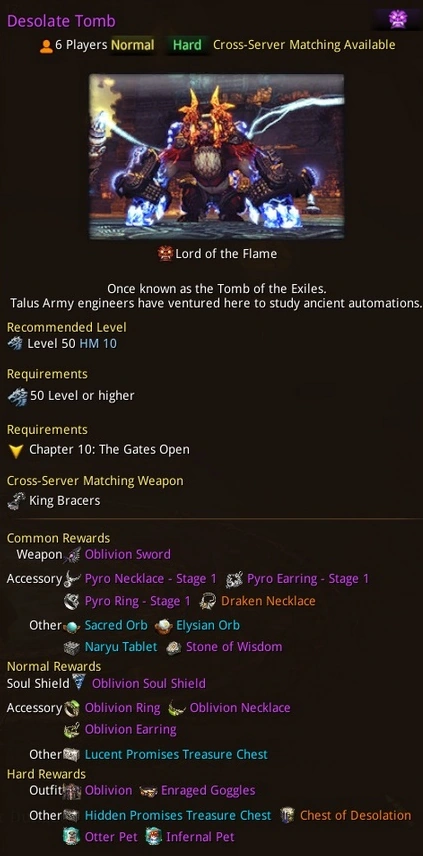
Desolate Tomb is a dungeon located in Zaiwei in the South District in the Cardinal gates at the northwest. Players must fight 3 main bosses within the dungeon, Jang Ghibu and his wives, the Iron Juggernaut, and the Lord of the Flame. Notable loot includes the Draken Necklace at a low drop rate from the final boss Lord of the Flame. Desolate tomb is one of four dungeons to have a hard mode.
Dungeon overview[]
Desolate tomb has some complex mechanics. It would be wise to understand the basic fights before entering the dungeon. NOTE: All mechanics are for normal mode unless indicated otherwise.
Lo Dan[]
When you first enter the dungeon you will be on the top of a large room filled with enemies. The only one you actually need to kill is Lo Dan, who is pacing around the center of the room.
After Lo Dan is dead a dragon pulse will appear in the southwest corner of the room. Take this up to the other side of the room, run through to corridor and prepare to face Jang Ghibu.
Jang Ghibu[]
Jang Ghibu is the first boss in the dungeon. He has 2 Destroyer wives who fight alongside him, Mengwol and Muwol. At the start of the fight, Jang Ghibu will have two buffs, Mengwol’s Romance and Muwol’s Passion. Each buff gives him 45% damage reduction. In order to remove this buff, you must damage Mengwol and Muwol to 70% HP. Be careful not to kill the wives until after Jang Ghibu is dead though, as that will cause him to enrage. After Jang is dead the wives must be finished off before heading to the next room.
Mengwol's rotation[]
- Targeted axe thrust.
- Unblockable linear kick that causes Knockdown.
- Targeted axe swing.
- Arc axe swing with a bit of windup, that causes Knockdown.
- Flaming 5-hit spins.
If the aggro holder stands 9 meters or further away, she will throw her axe to pull you back. If the axe throw fails, she will jump on you for an area of effect Knockdown.
Muwol's rotation[]
- Linear axe chop that puts a line of flames in front of her. This is done 3 times.
- 5-hit spins. The first 0.5 sec of this spin has a deflect effect, and if hit into she’ll do an axe sweep for Knockdown into a launch for an aerial piledriver.
If the aggro holder stands 9 meters or further away, she will perform a shoulder charge inflicting Daze.
Jang Ghibu's Rotation[]
- 100%-71%:
- Fast cast fire projectile, inflicts Ember.
- Slow cast fire projectile, inflicts Ember.
- Instant linear rectangle fire Dragonblaze, inflicts Daze and Ember.
- Fast casting unblockable area of effect Fire Storm, inflicts Aerial if Dazed, inflicts Ember. Can be CC’d.
- Instant bouncing fire projectile, deals no damage but stacks 2 Embers.
- Instant rectangle Impact, detonates Embers for very high damage.
- Repeat
If the aggro holder stands at 7 or more meters, Jang Ghibu uses Flame Fury to throw a volley of fire projectiles, then slides behind his aggro holder.
Periodically, Jang Ghibu casts Heatwave in between rotations, dropping a fire flower, then shortly detonate it for a unblockable area of effect Knockdown.
- 70%-41%:
- Instant frost projectile, inflicts Chill for movement speed reduction and approach skill disables, transitions into Freeze on 3 stacks of chill inflicting root and Ice Coil explosion if the root is not escaped from
- Slow cast frost projectile, inflicts Chill
- Instant linear rectangle frost beam, inflicts Freeze, can be CC’d.
- Instant frost projectile, inflicts Stun and Freeze, can be CC’d.
- Repeat
If the aggro holder stands at 7 or more meters, Jang Ghibu uses Frost Fury to throw a volley of frost projectiles, then slides behind his aggro holder.
Periodically, Jang Ghibu says “You will be mesmerized…” or “You cannot resist me!”, puts the furthest person from him in Frost Prison, slides behind them, and slowly casts Ice Coil for massive damage on the person in Frost Prison. Frost Prison can be escaped using Second Wind, and the Ice Coil casting can be CC’d.
- 40%-0%:
- Slow cast fire projectile, inflicts Ember
- Instant bouncing fire projectile, deals no damage but stacks 2 Embers
- Sets a ring of fire, an unblockable targeted AoE with a wide area that will detonate the next attack
- Slow cast wide linear unblockable rectangular flame Dragonchar, can be CC’d.
- Instant Impact, detonates Embers
- Slow cast frost projectile
- Slow cast wide linear rectangular frost, inflicts Freeze, can be CC’d.
- Ice Coil, regardless of Freeze status
- Repeat
If the aggro holder is too far and stands 7~ meters, Jang Ghibu uses Flame/Forst Fury to throw a volley of flame/frost projectiles, then slides behind his aggro holder
Periodically, Jang Ghibu casts Frost Prison at the furthest person, slides behind them, and casts a linear rectangular Dual Dragons for massive damage on the person in Frost Prison. Dual Dragons comes out much faster than Ice Coil in the previous phase. Frost Prison can be escaped with Stage 1 Tier 3 Trinket Escape, and the Dual Dragons casting can be CC’d.
Special Mechanics[]
- At 70% and 40%
- He will jump into the middle and call his wives to him; they will stop whatever they are doing and jump to his sides, and once they land Jang Ghibu casts a field-wide Frost Prison. The Frost Prison can be removed with Second Wind.
- He then casts a field-wide unblockable area of effect that inflicts two consecutive hits while the wives to his side perform a dance. Use your iframes when the swirl effect starts to appear. After the first area of effect, the wives will heal back to full health and return the shield to him.
- He casts his two consecutive hit area of effect again; this time the wives will spin around the room inflicting Aerial and bounce along the room’s edges back to their starting location.
- The wives are fully healed and Jang Ghibu regains his protection from them.
Hard Mode differences[]
- In hard mode, Jang Ghibu's special attack at 70% and 40% will do 3 AoE's instead of 2.
- At 20%, Jang Ghibu will cast a 3 hit AoE every 30 seconds, while his wives spin around the room.
Strategy[]
- You should have 3 tanks, one for each wife and one for Jang. The tanks fighting the wives should keep them away from the main boss so the rest of the party can DPS without their interference.
- When Jang Ghibu's special attacks are happening at 70% and 40%, it is recommended to use one of the Party Protection Skills to block the damage.
- If the party has high dps, save buffs until the wives are at 70% and the boss is at 75%. Use buffs and burst the boss down. If you can kill it in this time it is the fastest solution.
- The Summoner can use his partner tanks 2 wives by using Crouching Tiger (Move2) and root them. After 2 wives HP reach 70%, make sure the aggro holder is summoner’s partner, then the party can leave 2 wives with him and all-party members can focus on the main boss.
Detector[]
After Jan Ghibu and his wives are killed the team can continue into the dungeon. There is a corridor filled with various add mobs. These can all be ignored and run past or killed. After awhile you will find the Detector miniboss. The easy strategy for the Detector is to stand in the indented walls on the side of the corridor and kill him with range skills. You can stand near him, but you must iframe the robots as they roll over or you will be frozen. After the detector is dead you can continue. The party will come to a room with platforms going up the side. At least one player must jump up these platforms to get to the top. At the top is a lever that spawns a dragon pulse the rest of the team can take to the top.
Iron Juggernaut[]
The Iron Juggernaut is the second boss in Desolate Tomb. He will remain stationary in the center of the room during the entire fight.
Iron Juggernaut's Rotation[]
- Targeted swipe.
- Two frontal drills with a very small area of effect inducing Knockdown.
- Randomly one of:
- Fires a linear spray of bullets inducing Knockback and Daze.
- Fires a long unblockable linear laser inducing Knockback and Knockdown.
- Unblockable area of effect electric pulse inducing Knockback and Knockdown. Can be CC’d.
Special Mechanics[]
- At 70% and 30%
- Three Recovery Automatons with 2x CC Bars are summoned in the corners and will heal Iron Juggernaut.
- Once the Recovery Automatons are dead, three Attack Automatons with 1x CC Bar are summoned and try to jump to Iron Juggernaut’s aggro holder unless someone else takes their aggro. On death, they drop a shield, two of which are needed to succeed the mechanic.
- After 15 seconds since the Recovery Automatons were spawned, Iron Juggernaut curls up and becomes immune to attacks, and then targets the furthest person and fires three unblockable missile volleys that leave flaming puddles.
- Another trio of Recovery Automatons will spawn.
- Iron Juggernaut retargets the furthest person and fires three lightning pellets at them.
- Iron Juggernaut then retargets the furthest person and fires up to two unblockable long-range linear laser beams. This won’t hit you if you’re standing right next to the door.
- Iron Juggernaut then retargets the furthest person once more and fires three lightning pellets
- There is a glitch that, if Iron Juggernaut collapses at the same time it tries to prepare its next attack, it will curl back up and remain unattackable until after its Knockdown status ends.
- Iron Juggernaut slams down three times with pauses in between, producing a field-wide unblockable shockwave. Iron Juggernaut still cannot be targeted at this time. After the shockwaves, Iron Juggernaut will uncurl and can be CC’d while doing so. This is skipped if the mechanics are done correctly. See strategy for details.
Hard Mode differences[]
Mechanics happen every 15 seconds instead of at health percentages.
Strategy[]
- For the fight, the party needs 3 roles. Missiles(mark), Shield 1(s1), and Shield 2(s2). Anyone can do any of the roles, and all 3 are only for the special mechanics of the fight.
- When the first wave of recovery Automatons are dead the player doing mark should run up the staircase the team entered from. The Iron Juggernaut will become invulnerable to attacks and target the furthest player(Should be the marker) to shoot missiles at. The marker should walk slowly down the stairs diagonally to avoid the missiles. If done correctly, all missiles will land on the stairs and be out of the way of the team.
- While the mark is doing missiles, the rest of the team should kill the Attack Automatons for their shield drops. S1 and s2 should both take one of the shields when they drop. Also kill the second set of recovery automatons as soon as they spawn.
- S1 should be waiting near the exit staircase. After the juggernaut becomes immune and starts shooting missiles the player should walk up the exit staircase, making them the furthest player. After the Iron Juggernaut finishes firing missiles he will target s1 and fire 3 lightning pellets at them. The shieldbearer must press 1 to absorb the lightning onto the shield. The block window is .8 seconds. The s1 should walk down the staircase as they block pellets while s2 walks up the exit staircase. When all 3 lightning pellets have been collected, the s1 should press LMB to throw their shield at the Iron Juggernaut.
- S2 should now be at the top of the staircase. The Iron Juggernaut will now target s2 since they are the furthest player. Standing at the very top of the staircase should protect the player from the long-range linear laser beams. After the beams are fired the Iron Juggernaut will fire 3 lightning pellets at s2. S2 must block them just like s1 did, and throw the shield at the end.
- If s1 and s2 are done correctly, the Iron Juggernaut will be knocked down and can be dpsed. If not, use a party protection skill to block the slams.
- Repeat this for all the mechanics.
Corridor[]

Lord of the Flames[]
The Lord of the Flame is the last boss of Desolate Tomb. His rotation is same as Infernal Lord from Tomb of the Exiled but with faster and stronger attack. He can deal high damage to himself by mechanics.
He has 41,646,000 HP in easy mode and 63,100,000 in hard mode.
He has 2x CC bars.
The party has 8:20 minutes to defeat him or he will enrage.
Rotation[]
1.A frontal claw swipe in a cone inflicting Knockback, Daze and Ember.
2.Random between
- A frontal claw swipe in a cone
- A rear claw swipe in an arc
3.After 90%, Lord of the Flame throws a 5-second time bomb to the first person who attacked him
After 60%, He throws two time bombs.
This bomb must be lured away from the party. It has an unblockable area of effect explosion inflicting aerial to the carrier and Knockdown to other, and inflict a stack of Ember.
4. Two-hit spin, both hits inflicting Ember, the second hit inflicting knockback and knockdown. Can be CC’d
5.Long range unblockable linear flame breath, inflicts Ember.
6.After 30%, Lord of the Flame does a field-wide unblockable area of effect roar, inflicting stun and detonates ember stack
If knocked down, Lord of the Flame does a getup unblockable area of effect ground pound
If the aggro holder stands further than 9 meters:
1.Lord of the Flame throws four unblockable fire projectiles at random people, Inflicting ember
2.He throws a second set of four projectiles
3.Spits a fireball that leaves a large flaming puddle